Monday, August 10, 2015
Friday, August 7, 2015
What I Feel Like When I Sew
After my pajama failure I've taken a break from sewing... I'm not done with sewing--just not sure where to go from here. Hope to get cracking again soon! (This post is scheduled to upload on the first day of my family vacation so I don't plan on posting this Friday like normal)
In the meantime here's a video of what I feel like when I'm sewing.
Monday, August 3, 2015
Pajama Shorts Part 3 (Sew Disappointing)
So this blog is sort of a bittersweet ending so be prepared! I've been working on making some pajama pants (and yes it's taken me 3 days so far but I have a job!) I woke up this morning ready to start sewing.
I started where I left off yesterday looking at the instructions and the fabric and just being horribly confused for an extended period of time.

Do those instructions make immediate sense to anyone? I spent a good chunk of time today contemplating what they meant by that and what I should do. There was a spot on the pattern that was indicated as the cutting line on the left side. But was I supposed to cut it or not? The picture shows it still attached at the bottom so do I just cut a slit? If that was the case why did the line on the pattern show it going all the way through? My final verdict was that it was the area you cut if you were working with a smaller size so I took my chances--told myself that it was okay to make a mistake and cut it off completely. (If that was the wrong thing someone tell me so I don't make that mistake again!)
 On to the sewing! I pinned the short legs as it showed being sure to line it up perfectly
 When it's lined up right the triangle marks you made earlier should match up--this was a huge relief to see that I was doing something right.

Next came the actual sewing, I read about this sewing hack to help you stay on your seam allowances. You put a rubber band around your machine on the line that measures allowances so it's easier to see and follow.

Next I pressed the seams so they would lay flat. I did the same thing with the other leg.
In an earlier post I talked about my bizarre, impromptu way of measuring myself in the fabric store and I would like you to know that the next day I used my measuring tape and that I was close enough that I had indeed bought the right amount of fabric and used those measurements to pick what size I would be using. So when I realized there was no way my assets would be fitting in these shorts I got extremely upset.
I ran to look at my measurements again and compared them to the the pattern measurements; thinking I must have looked at it wrong--but no I'd deciphered the pattern correctly. Next, I went to measure myself again thinking that perhaps I done it wrong...and that's when I realized they never had me measure my behind--just my hips. So I took that measurement and sure enough my hip measurement is a small but my bum measurement is more befitting a medium/large.
Next I realized I didn't transfer the folding lines onto the fabric from the pattern so I had to go back, line up the pattern and make those marks. This is where I really kind of just did my own thing because the instructions were really confusing and I just didn't really have the heart to try to figure out what they were trying to say. I think I got pretty close and it seems pretty correct in any case!
Most importantly: how do you get over your sewing failures/disappointments? (This project had me hesitant to start sewing again for a good week or so.)
I started where I left off yesterday looking at the instructions and the fabric and just being horribly confused for an extended period of time.

Do those instructions make immediate sense to anyone? I spent a good chunk of time today contemplating what they meant by that and what I should do. There was a spot on the pattern that was indicated as the cutting line on the left side. But was I supposed to cut it or not? The picture shows it still attached at the bottom so do I just cut a slit? If that was the case why did the line on the pattern show it going all the way through? My final verdict was that it was the area you cut if you were working with a smaller size so I took my chances--told myself that it was okay to make a mistake and cut it off completely. (If that was the wrong thing someone tell me so I don't make that mistake again!)


Next came the actual sewing, I read about this sewing hack to help you stay on your seam allowances. You put a rubber band around your machine on the line that measures allowances so it's easier to see and follow.

Next I pressed the seams so they would lay flat. I did the same thing with the other leg.
*****
This is the point where I realized this wasn't exactly going to be a success. I took both the legs and tried them on and realized that there was not enough fabric to cover my--how do I say.. my ample derriere. So much disappointment. I've just spent the good part of 3 days on something that won't even fit me!In an earlier post I talked about my bizarre, impromptu way of measuring myself in the fabric store and I would like you to know that the next day I used my measuring tape and that I was close enough that I had indeed bought the right amount of fabric and used those measurements to pick what size I would be using. So when I realized there was no way my assets would be fitting in these shorts I got extremely upset.
I ran to look at my measurements again and compared them to the the pattern measurements; thinking I must have looked at it wrong--but no I'd deciphered the pattern correctly. Next, I went to measure myself again thinking that perhaps I done it wrong...and that's when I realized they never had me measure my behind--just my hips. So I took that measurement and sure enough my hip measurement is a small but my bum measurement is more befitting a medium/large.
*****
At this point I was so angry that I gave the sewing project the silent treatment, sat down on my couch and watched a TV show. By the time the show ended, a lot of my frustration had melted away and I decided I got this far so I might as well finish and could give them to someone with a normal sized butt. I tried to tell myself this was a good thing because when I do make them for myself I'll already know what I'm doing. So I pressed onward.
I wasn't as good at taking pictures at this point because I'd lost a lot of the enthusiasm but you line up the legs one flipped inside out inside the other leg and you sew along the curve of the crotch and up one side (what will become the back), then sew another seam line closer to the edge through just the crotch--I imagine this gives it a little more strength because your crotch seam probably takes a lot of stress when you sit and walk around. (I've been saying crotch a lot and it seems weird... crotch... that's what the pattern refers to it though!) (Crotch, what a funny word!) You press open that seam.
 |
| The crotch pinned and ready to sew |
Next I realized I didn't transfer the folding lines onto the fabric from the pattern so I had to go back, line up the pattern and make those marks. This is where I really kind of just did my own thing because the instructions were really confusing and I just didn't really have the heart to try to figure out what they were trying to say. I think I got pretty close and it seems pretty correct in any case!
I folded over the edges on both sides so they matched the little line I'd made part way through--and pressed that, then basted the edge (basting is loose stitches that can come out easy--usually you do it by hand, it just helps keep things in place until you actually sew it). Next I folded one side to the larger fold line and pressed. Then I overlapped the two front pieces and sewed along the curved sewing line and back up the front. Done. Completed!
I don't want to take the time to sew the waistband on this project just yet, and instead plan to work on making shorts that will actually fit me. I'm not quite sure how to go about it though because a medium or large won't fit me as well anywhere else. I plan to do a lot of research and figure out what the best course of action will be!
Anyone else have a problem with the sizing like this? What do you do to make adjustments? Should I just make a larger size and then try to tailor it tighter? Or do you make adjustments to the right size pattern?
Most importantly: how do you get over your sewing failures/disappointments? (This project had me hesitant to start sewing again for a good week or so.)
Friday, July 31, 2015
Pajama Shorts Part 2 (AKA Pattern woes)
I bought a pattern and some fabric (you can read about it in this post here) in order to make some pajama shorts. Today I woke up excited to finish the whole project in a few hours. I definitely need to work on being a little more realistic when it comes to what I can accomplish right now--I've always been bad at estimating the time things will take me but I'm not usually this far off. And with that note I'll give you a quick tutorial of what I did:

First I opened the packet took everything out and stared at it completely lost for a huge amount of time (if I was to do this again, I would take this step a bit faster). I ended up spending a lot of time looking up how to read a pattern, I found this video especially helpful.

After I was done feeling completely overwhelmed and lost, I started by cutting loosely around the pattern I wanted.

They said you should iron the pattern pieces--and I really tried but my iron sometimes leaks water which I was afraid was going to ruin the pattern. That's what you get from a free iron I guess. In the future I'll have to buy a nicer iron that won't ruin things.


It worked pretty well--I'm not sure if there's a better way to do what I did but this worked well enough for me. I transferred all the inner markings on as well. Then cut the whole thing out.


Next I pinned the wax paper in place to the fabric and started cutting. I used my rotary cutter and ruler for the long straight edges and my scissors more on the curves or the trickier, little spots.


This was the day where my enthusiasm got lessened a bit when I realized that despite my good intentions and excitement I really have no clue what I'm doing currently. I still really want to finish this project and learn how to sew I think this was the first moment where it struck me that this is going to be hard, like really hard.
So far I have still been very motivated to learn and patient enough with myself so when it takes a lot longer than expected I keep moving forward. I hope I can keep this patience with myself long enough to get good enough that I don't ever need to be this patient again!
Those of you who sew: do you do anything like my wax paper invention? Any one have a similar feeling of dread when you opened your first pattern packet? How do you keep your enthusiasm for sewing alive?
Monday, July 27, 2015
Pajama Shorts Part 1 (AKA shopping disaster)
I was feeling pretty good about my apron successes (you can see them here in an earlier post) and was trying to decide on the next project and remembered making pajama bottoms when I was a young whipper-snapper so I thought--that can't be too hard, right? So wrong. I'll take you through the steps of what I did and what I wish I'd done differently. Also: I looked online for a tutorial for this pattern and realized that there isn't one anywhere so I figured if I post this maybe I can help others who are currently just as lost as I am! Welcome! Learn from my mistakes!

From the little (and I mean very little) research I did do I learned that it's hard to make things out of a pattern that HAS to face a certain way--for instance if you have a fabric that has cats on it, you have to buy more fabric and work harder to make sure all the cats are facing the same way. So I really liked this blue/red hearts fabric because it was a cute fabric but there's really no right way for it to be. I picked the red because it looks well with it and it bugs me a little when people have tops and bottoms that are the exact same pattern (I mean--why not just make a jumpsuit?!)

First I went to the store to pick out a pattern--in hindsight I wish I'd done a little more research before leaving the house. I got to the store and kind of wandered around aimlessly looking for the patterns, found a very small selection and looked through them and and alas! No pajamas. I was thinking that just doesn't seem right and was wondering if everyone who sews just ends up sewing the same exact things because there are only 40 patterns for sale. Then I saw a woman at a table looking though some books that had patterns in it and realized how dumb I was being. There was a gigantic filing cabinet thing next to her and I put two and two together and realized they don't have all the patterns out on shelves.
I looked through and found a pattern I liked, I picked this one because it had a lot of different options to choose from: shorts, pants, long sleeve shirt, short-sleeve shirt, and a robe with a belt! The patterns seemed relatively easy so I figured I'd go for it and as I advanced I could try doing some of the harder items.

So I had the pattern I wanted next I had to pick out the fabric--sounds easy enough. So WRONG! I spent an hour wandering around looking at different fabrics at a complete loss. First I noticed on the back that they have suggested fabrics you should use and I could not for the life of me find those fabrics anywhere! I had no idea what to even look for--what is a broadcloth?! Sounded like some sort of medieval thing to me. I asked a woman for help and she pointed in the right direction and told me I most likely just wanted a cotton blended with polyester or something so it didn't wrinkle as badly. I picked out these.
 |
| I think they're cute! |
So I had the fabric picked out but then I had to figure out how much I needed. I was at a loss. The back of a pattern packet is like a foreign language! I really wish I had done some research on what everything means on the back of those. I also wish I was less awkward and felt comfortable enough to ask for help instead of just staring dumbfounded at a piece of paper for half an hour. I finally figured out what it meant: it has measurements in inches on one side and then gives the amount of fabric needed in yards.
Another issue: I did not take my measurements. Mistake. Why do they number woman's pants weird?! Men's waist sizes are already in inches ex: 32, 35, etc; but us women get things like 9, 10, 0--I mean zero?! What does that even mean? Zero is the absence of something--that's not an accurate measurement. For awhile I tried to think back to a time I'd accidentally worn my little brother's slacks but I couldn't remember what size either of us were at that time so that was no help. Then I realized thanks to good ol' bras I knew my bust size. So from there I tried to compare my bust to my hips to try to decide what the measurements would be. I probably looked extremely crazy and like I was majorly checking myself out/feeling myself up. I'm very glad that crafting is primarily a female thing so I didn't take the awkwardness to a whole new level.
Finally I felt confident enough if my make-shift measurements to purchase my fabric. Next I was on to buying the notions. I had noticed during my staring contest with the back of the pattern that there was a section that told you everything you needed to buy so I went around--and got everything I needed. This is the one thing that I'm proud of and felt that I did right. I got elastic for the pants, some sew on snaps, buttons, and matching thread.
From researching (I did some!) I knew that before starting anything I should wash and dry my fabric so it could shrink before sewing it. So I followed the care instructions and felt pretty good about doing another thing right until I took it out of the dryer.
 |
| Thank you for giving me a success out of this shopping trip! |

It had frayed a little and the strings got all tangled together in a ball. Is this normal? My other fabric didn't do this, is there a step I missed or is this to be expected? The fabric seems to be fine other than that. That's where I stopped for the first day,
Next I will start sewing my shorts and hopefully finish! I'll update soon on the progress I've made!
Monday, July 20, 2015
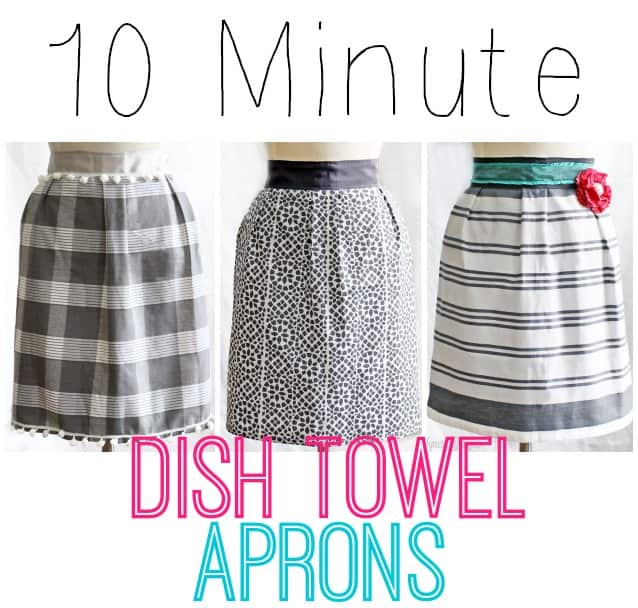
Dish Towel Aprons
So I had looked up easy things to sew and found this tutorial from Fynes Designs to make aprons out of dish towels:

Go to blog here http://www.fynesdesigns.com/10-minute-dish-towel-apron/ for more information and the super easy step-by-step tutorial.
It was advertised as a really easy sewing project--all you needed to do was sew in a straight line which I had already accomplished!
First I had to go to the store to find materials; the hardest part was hunting down good dish towels to use. I wanted them to be a cute pattern but not a print that had to be facing a certain way because I realized that when you turn the dish towel into an apron you're having it 90 degrees the way it was designed to hang so cute owl towels were out because they were all flying sideways.
Finally I found a good set of towels at Bed, Bath, & Beyond for $9.99: They are a brown, tan, and a blue color that I thought was very rustically pretty and they all had a pattern that could be flipped any way I wanted.


I plan on adding a lot of cute things to it like little fabric flowers or buttons and the such so this is not the finished project by any means but I'm antsy to get sewing for real so they'll stay like this for awhile, I'll post an update when I finished enhancing them!
So if you were keeping a running total I spent about $10 on the towels and $12 on ribbons bringing this total to just over $4 per apron!! Not bad at all especially after I finish embellishing they are going to be just too cute!!
Any ideas for cute additions? If you try it let me know how it works out!
Go to blog here http://www.fynesdesigns.com/10-minute-dish-towel-apron/ for more information and the super easy step-by-step tutorial.
It was advertised as a really easy sewing project--all you needed to do was sew in a straight line which I had already accomplished!
First I had to go to the store to find materials; the hardest part was hunting down good dish towels to use. I wanted them to be a cute pattern but not a print that had to be facing a certain way because I realized that when you turn the dish towel into an apron you're having it 90 degrees the way it was designed to hang so cute owl towels were out because they were all flying sideways.

Next I went to find ribbon. The instructions given tells you to make the ribbons 80" so I whipped out my phone and found out there are 36 inches in a yard so it would have been a little over 2 yards. But while shopping I realized most ribbon rolls came in 4 yards so if I cut a whole roll in half in would make 2 apron ribbons and just be a little shorter than recommended, so I'll just have to give them to skinny people! (This is how I problem solve!) I bought 3 rolls of ribbon from Hobby Lobby for $3.99 each.

Next I followed the tutorial on the Fynes Design blog (http://www.fynesdesigns.com/10-minute-dish-towel-apron/ ) It was a really easy tutorial to follow, I sewing along the very top of the ribbon and the towel/skirt first taking out the pins as I went and only on my first apron did I make a pretty big mistake: While sewing the bottom of the ribbon I accidentally sewed one of the pleats to the wrong part so it doesn't pleat the way it's supposed to.
 |
| It's sort of hard to see if you don't know what you're looking for (on the right side of the pleat) but it's so wrong and keeps the skirt from falling the right way |
On the other aprons I pinned them and then ironed them before I sewed and I feel it helped the pleats show up nicer and made it a little easier to sew. All in all a really great first attempt!
 |
| One completed apron (It needs to be ironed before I give it away) |
 |
| I added a big bow to this one and it's currently my favorite! Don't judge my messy room! |
Any ideas for cute additions? If you try it let me know how it works out!
Friday, July 17, 2015
Sew Many Supplies!!
You don't have to read this post. It may be helpful if you're a beginner like me, but for anyone else it's not that great. It's probably really boring--and let's be honest--it's just a way for me to show off the things I got and try to get some validation for my matching pink scissors!
So I decided to start sewing and after much research, I headed out to the store to pick up some supplies. (This was one of the activities I did while I had to wait for my sewing machine to ship)
So I decided to start sewing and after much research, I headed out to the store to pick up some supplies. (This was one of the activities I did while I had to wait for my sewing machine to ship)
First I picked out some scissors. You should have some sharp, stainless steel scissor that feel right in your hands. Can't explain it, they just need to feel right so if you can test them out a little, most scissors are packaged so you can sort of try them out. I liked these ones and I liked that they were pink and not the ugly orange color the other ones were.
 |
| I like to refer to them as mommy and baby scissors |
You really should have 2 pairs of scissors: a larger pair, 8" for cutting out fabric, and a small pair for cutting thread and trimming nose hairs. Just joking about the nose hair part, but in all seriousness apparently the first thing you do once buying scissors is to make a blood oath that you won't use them for anything other than fabric and sewing projects. If you use them for anything else they dull really fast, or to be honest get lost for a really long time.
Next there's pins and a pin cushion. Loved the pink--decided I might as well go with a theme at this point and things got little overly girly. Pink's not even my favorite color, I promise I'm really an adult and that I'm not someone regressing back to Barbie days.
 |
| Fun fact I learned: the strawberry attached is used to sharpen the pins! |
 |
| As a bonus--it doesn't clash with the pink theme |
When you pick out a rotary cutter it should be one that has a cover or safety on it so you don't accidentally cut yourself (apparently they are extremely sharp and I am now extremely nervous), and so the blade doesn't get messed around with. Mine has a retractable cover which seems nice but I imagine eventually it may not work as well as it does now--I went a little cheaper on this. There's really not a good reason I picked this mat, it was grey and a decent enough size with out breaking the bank (I kid you not they sell some bigger ones for over $100!) so I got it. The ruler I liked because it is clear so you can see the patterns on your fabric well and it has a little lip edge on one side you can slide it on your mat and be sure that you're making a straight line.
Got some needles (BORING) for hand sewing and for the machine just in case (I guess... I mean, so I'm told.)


Some seam rippers--these are a must for my current skill level--in fact I probably should have gotten some seam rippers before buying the sewing machine! They say you should have two because you lose them pretty often (I had to stop myself from going overboard and buying six because I lose things so often!) I got a small cheap pink one keeping with my earlier theme and a larger one that fits more comfortably in my hand for those long mistake projects I anticipate I'll make.
 |
| Ironically enough I couldn't find the little pink one when I went to take pictures.. |
Picked up some basic thread colors and some extra bobbins. A must need. I figured I'd probably use black and white a lot and then got some few other colors I knew I'd be needing soon.


I bought a few yards of really cheap muslin. I read somewhere that this is a good thing to do as a beginner so you can practice something you're feeling uncomfortable about with a really cheap fabric instead of messing up your pretty, expensive fabrics. Seemed like a great idea to me so it became a must! (Writing this currently, I feel that the muslin has helped give me a little more confidence to try some harder patterns than I would have started with originally.)
 |
| This fabric finally helped me figure out the difference between Muslim and muslin.--I kid you not! |
I got some of this tracing paper, you place the paper between your pattern and your fabric and roll the baby-pizza-cutter device over it and it transfers little dots on your fabric so you know where to cut. To be honest I got it mainly because it reminded me carving pumpkins and that was always my favorite part.
 |
| Now I just want to carve a pumpkin... |
 |
| The pink part is especially important! |
 |
| Have to restrain myself from playing with this one |
 |
| Don't worry--there's some pink on it! |
Those of you who are more experienced in sewing: did I leave anything out? What's your favorite sewing accessory? Anyone else end up with a theme to their accessories--or am I alone in my weirdness?
Subscribe to:
Comments (Atom)